Wednesday, December 26, 2012

Inspirations for the New Year

Kite earrings in blue and green
©2012 Nayna Studios™
Inspiration they say can strike anywhere well  looking for inspiration I realized that simply anything can turn into an idea, sometimes it is another artist's work  that set the old cogs turning, sometimes an everyday object , at times a beautifully hued drying leaf. More than once I have stopped short on my way home from the studio to stare at a dry leaf that had the most amazing combination of red, green and yellow (how does mother nature do it !!) 
At other times its my feelings sometimes I can truly confess that there have been occasions when I have been angry and taken it all out on a piece of metal (let me tell you do it right and you end up with  some fantastic designs :D) 

But what better source of inspiration then the seemingly endless line up of festivals in our beautiful country ! This pair of kite earrings was the first such design, I was only trying to do something commemorative of the festival of 'Sankranti' a festival that heralds spring and is always marked by flying of kites all over the country. Its quite common to see young , old, Men Women all practice and even compete fiercely on the day (the one who cuts another's kite gets to keep it :) Little did I know this piece would prove to be so popular I have lost track of the number of these I have sold !
X'mas Set
©2011 Nayna Studios™

The second such piece I have worked on is this Christmas set with a reindeer on the pendant and a pair of holly leaves for the ears. This one was of course inspired by the Christmas and is quite a sweet piece. I got quite the reaction to this one as well :)
So now my question is this what should I create for the very important upcoming New Year ? While not traditionally a festival it does symbolize everything new, new hope, new beginnings, new (dare I say it ) resolutions ! What would in your words qualify as the interpretation of New Year?

Monday, December 24, 2012

Back to the pitch and some added mask mania

Line work on the two mask profiles.
For those of you who are not in the know, I am first a metal artist and then jewelry artist and while I do keep working on my art, I spend most of my time designing and creating jewelry, using all the techniques I learnt as a metal artist. I use most of what I learned not all and repousse` is one such technique that I rarely use any more. That is un-till I saw a piece by a Laurie Jane Kern on her blog The Adventurous Silversmith. She had made the most gorgeous Cuff which she had named 'The Calamari Cuff' It was a gorgeous piece in silver with detailed repousse and some very smart patina finish. Looking at all of her pictures and the way she had created the relief on the cuff reminded me of my college days and how much I used to love working with copper repousse often creating specialized tools for the required project in hand! ( Our professor was quite the tough task master when it came to hand crafting each tool something that I will forever be grateful to him for it has really made me appreciate a well made tool and the benefits of being able to create one by myself :)
Now you might wonder why a Mask for the design element that is because I have a very old relationship with the subject of masks. You see my final year dissertation subject was mask and masking traditions around the world, so I simply could not resist combining the two passions! 
Mask Cuff
©2012 Nayna Studios™
Although not very detailed these faces took me back ten year when all did sleeping waking talking was think masks ! Heck I had the mask mania so bad I even had my friends hunting for material for my research :P
Well this little piece turned out very well including soldering the edges perfectly :)

Mask Cuff
©2012 Nayna Studios™


Saturday, December 22, 2012

Baby Anklets can there be cuter jewelry out there ?

          A few days ago my maid who usually either finds my work fascinating or thinks I'm completely nuts! asked me whether I could make some anklets for her grandson who is all of 6 months old. Now you might wonder what's with anklets for a baby well traditionally here in India all babies above the age of a three months are given a pair of sturdy ( well sturdy for them :D) usually made of metal so as to help them gain strength in their wee muscles and improve blood circulation. These are usually made of either copper, silver or what we call 'Panch Dhatu' meaning five metals. The combination of metals like gold, silver, copper, bronze, nickel or sometimes zinc is considered to be very good for one's health (as per ancient Ayurveda ). 
         Obviously with the prizes of gold and silver being what they are today my maid wanted to know whether I could make a pair out of copper for her . Well  you know me I'm game for experimenting at all times :)
           So here is my version of baby anklets. I balled up the ends of some 14 ga copper wire so that there would be no sharp ends to hurt the little tyke and flattened the wire in my rolling mill. This was followed by gripping one end of the wire in my bench vise and the other in my hand drill a few turns later lovely twisted wire !
I suppose I could have made it easier by doing the twisting first and the balling later but anyhoo I loved it and apparently so did the kiddoo ! 
And if  you are wondering I do kiddoo custom work for free !!! 

Wednesday, December 12, 2012

What is your favourite piece of jewelry??

My mom's shell set

Everybody has a favorite piece of jewelry from their childhood days, mine was this gorgeous set consisting of a necklace, a pair of earrings, finger ring and a very stunning pendant with a swan carved into it. This set was completely made in shell, with small red stones in the center of each panel. The stones are probably faux rubies I am not sure but I was not concerned by that ( guess I still am not !) I think the piece intrigued me so much because my mother never really wore it and each time I asked her about it I got a' I,m keeping that for you ' liner! Maybe she didn't like it well, I loved it still do, over time I have added a hair clip with similar carving.
The hair clip in shell, the two holes on
either side are for the stick.
Another of a favorite piece is a very delicate filigreed Silver hair pin that my grandmother gave, when I was just 6 its a rose with each petal crammed with spiderweb like thin silver wires. Filligree is no longer in trend nor is it favored by many due to the nature of its manufacture. Ideally small children are used for their nimble fingers and sharp eyes.
My Grand mom's silver filigree rose Isn't it gorgeous!!!

I am waiting for the day when one of my creations becomes a favorite with one of my client's :)
So what is your favorite piece??

Tuesday, December 11, 2012

A loss, a move and some cute plastic tins !

What do you do when you loose something that is close  to your heart? You mourn it and move on well I was officially in mourning for a good two months! why you ask ? what did I loose? I lost my studio :(( Around the month of August I was informed by my landlord that he intended to raise the rent by quite a considerable amount and given the rising cost of well just about everything it made sense for me to move out! Well logic aside I had simply fallen in love with my space basically just a single room in a flat but since the owners rarely came over to use the other rooms I had the place to myself and could work and listen to music and make a complete mess of the space in peace ! Oh it was bliss !!   But the fact is I have to continue to work because lets face it I may have been in love with my studio but I am as good as married to my work :)

          Shifting back was easier said than done my old room converted into my studio with my study table turning into my enameling table ( I had to sacrifice my larger enameling table since there would be no space for it ) my converted jewelry bench and machine table made it so did my tool board and shelving. As did my large furnace and after having tried my best to work with limited moving space me and dad have come to the conclusion that since I no longer enamel larger bowls or panel,  the large furnace must go ! Not out of  the house just into the balcony :(  While that move is still pending here are a few smaller organizational ideas that I came up with

The first was sorting out my hand tools for the longest time they remained dumped in one old tin box but here they are now  sorted into punches and chasing and repousse tools, aren't the round tins cute?
Bonus I get to buy cute plastic boxes like these !

The next step was sorting my enamels easier said than done!! I am about half way there but the plan is to crush all the remaining lumps that I have into powder and then grade sift each colour
A transparent green that is all done, but quite a few colours that still need to be worked on. Coming up taming the enamel monster into sample tiles.....

Tuesday, November 27, 2012

Blue gold in a box


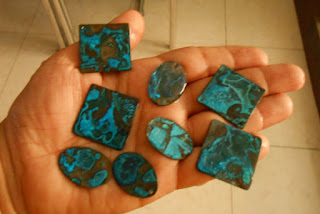
Making blue patina jewelry is one of my favorite activities in the studio. All this time I used to create one or a pair of pieces together at most since my set up was basically two tiny chutney bowls ( like the one below ) and a slightly larger bowl  upturned over them.
Then recently I realized I had sold off almost all of my patina earrings and needed to restock and this is what I came up with an airtight container, one chutney bowl and basically space to create as many pieces as I wanted! 

Here they are in the box just before I opened it up and the bonus I get to check on their progress all the time! 

All done! don't they look amazing I especially loved the uneven pattern that has developed. :)

Sunday, November 11, 2012

Miracle in a jar.


         Artists are regular folks too, and while designing and creating art (in this case jewelry ) is loads of fun, it does a lot of good to get 'away' from in some time. So what do I do to get away you ask ? I escape to a workshop of course !! Not in jewelry making but  terrarium making ! Now whats a terrarium you ask, well its a little piece of paradise in a bottle! The idea is to create an ecosystem inside an enclosed environment in such a way that it is sustainable  Once the plants  have settled in you do not open the container or interfere in any way. 

                    I joined up for a four hour course and was given a small fish bowl (oh yes you can create these in bottles, jars and any container that you can put fish into isn't that nice :) three beautiful  plants including a fern, a Fitonia and a Syngonium (see I get to brag about learning plant names here !!! )  After a very detailed lecture on how the ecosystem of the terrarium actually works ( which is best left to the experts and I am not one, so am sure to muddle it up :) we very gently placed some stone chips followed by some charcoal chunks ( helps in curbing fungus growth) , soil and finally the plants. After a light misting of water we sealed off the bowl with some cling film. 
                    Now you might wonder what of air for the plant and what of water, and how cruel is this but let me assure you the plants have enough of both,  you see the plants recycle the water that they loose through their leaves, as it remains in the sealed environment and so too the air. The oxygen that they release during the day is reused at night and vice-versa with the carbon dioxide, brilliant isn't it !!! 
                   So much like an artist and their connoisseurs, readers like you and fans on Facebook, all of you give inspiration that helps create art which in turn  hopefully brightens  your days, and your happy reactions give more inspiration, a miraculous cycle isn't it :)
We are at the beginning of the festival of Diwali at this time and I would like to wish you a very 'HAPPY DIWALI, May the Goddess bring joy, peace and prosperity to all of you :) 
Thanks for being here with me !! 


A fold here a fold there....

 Fold forming as complicated as it sounds, this technique has always fascinated and scared me equally :)

Recently though having bought my first small anvil and sourced a few hammers that I figured would work I decided to give it a try. The technique involves folding a piece of metal and then hitting it either at the fold or on the opposite side of the fold literally forcing the metal to turn.


Fold formed cuff
©2012 Nayna studios™
This lovely cuff started out as a straight piece of metal and the hammer blows caused it to turn upon itself thus giving it a beautiful shape. I will be following this post up with a detailed post with step by step pics. I just couldn't wait to share this experiment with all of you :)

Wednesday, October 17, 2012

Of Dragons and Butterflies in the Night !

 Weekdays are usually not my idea of fun days but this one so far has rocked! My Father for those not in the know is 65 years 'young' and loves to experiment especially with food. He came home yesterday with this strange looking fruit and announced that apparently his 'Fruit guy' ( we have fruit guys and vegetable guys :) had assured him that this was a very sweet and delicious and he called it I kid you not 'Drangon' fruit :D
Fruit guy aside turns out this is a Dragon Fruit, and while it was sweet, like a Kiwi ( which  it apparently is related to) it didn't quite have a flavor that I liked, a bit bland actually. I did find this great idea to use a Dragon fruit in future though.
Let me introduce you to our latest stopover guest, this cute little fellow flew in Monday evening around tea time and stayed through Tuesday afternoon. Guess he was looking for a place to rest his wings !


Night Sky
Black Onyx, Copper and Brass
©2012 Nayna Studios™
The most fun I had was yesterday evening as I packed this stunning piece to send it on its way to its home :) For those of you who don't know, I write a monthly e-zine that features some of my more exclusive pieces like this one and tips, stories etc exclusively for my subscribers. So if  you would like to get first dibs on new pieces do sign up here :)
So this was my half- week how was yours?

Friday, August 31, 2012

The dreaded 'S' word Shopping carts ! on your website

English: Shopping cart. PortuguĂŞs: Carrinho de...
English: Shopping cart. PortuguĂŞs: Carrinho de supermercado. (Photo credit: Wikipedia)
         So  you had a few direct sales and sales via your exhibitions and before you knew it people wanted to know whether you accepted credit cards. Well lets face it, its the easiest way to buy anything online these days.Well I recently had the same query and was all gung-ho about 'growing up' and getting me a shopping cart !
Well I found its not as easy as it sounds, first there are so many payment gateways ( that's what they are called) that you need to wade through all of them and their terminology. Then once you have narrowed them down you need to go through their requirements of you.These are mostly documents from the government and residential info and stuff that proves you actually are a legitimate business.  And you can forget banks cause they actually require you to have a very large turnover.

Now I am not naming names here nor am I complaining as the institutions are simply following rules set by the authorities and nor is this a how to on integrating shopping carts. Just stating my experience.
So this little jewellery artist will not be adding a shopping cart soon but will continue to use 'Pay-Pal' for online sales and I am thinking of adding their buttons to my website :)

What experiences have you had and what service would u suggest, do drop a line.

Enhanced by Zemanta

Friday, August 24, 2012

How to Prep for a show

            For the past few days now I had been preparing for a jewellery show well not exactly a show per-se but an exhibition that I have organized at a nearby suburb on the occasion of our Independence day . This is not my first show but it is the first  time that I am flying solo :) I always imagined getting ready for a show meant creating lots of new pieces, getting my cords and packaging in place and I was done, well turns out there is a lot more and I am not even scratching the surface.
Here is my list of 'Stuff'


Looks like a lot but I wish I had more inventory !
  • Flyers
  • Banner
  • Display stands and mannequins
  • Getting my cell phone battery changed! (imagine going through a whole show day with no cell phone connectivity!)
  • Visiting cards ( those flew of the shelfs like they were on sale !) 
  • Packaging materials (bags, boxes and tags )
  • Drape cloth to cover the table
  • Mirror ( for people to check themselves with my jewellery on )
  • Printed version of my newsletter
  • Guest book
  • Pens ! ( at least three)
  • Water ( I get very thirsty smiling and saying 'hello' :)
  • Receipt books
  • Pins, staples, glue and scotch tape 
  • Also sandwiches, fruits and I really wish I had taken some tea along there was none at the venue!

My Blue Nile necklace on a brand new neck mannequin 

You can see my visiting cards here to the right 
Check out my ring stand , single earring stand and neck mannequin in this picture. (you can also see my packing bags and receipt book here should have hidden those better :)


Well I had a really fun show and thanks to all the folks at the NRI complex Seawoods estate for their support and big Shout out to my friend Sharmila Sankar for her support and for her original idea that I have my show there :) Thanks Sharmila !

Thursday, August 2, 2012

Daisy ring with pearl

Pearl Daisy ring
Copper, vitreous enamel, pearl cabochon
©2012 Nayna Studios™

I love this style of layered rings and simply had to make this one ! As a added bonus I put in a pearl cab :) what do you think of this ring and should I be making these in more colours??

Tuesday, July 31, 2012

Blue Nile necklace

Blue Nile necklace
Blue agate, Oxidized copper
©2012 Nayna Studios™
Have you seen a kid in a candy store with those wide eyes and dazed look? Well that is exactly what happens to me every time I go into  my favourite bead shop :) The last time I was there I managed to get a bag full of agates in various sizes and shapes ( did I mention that dazed look ?  I never take the time to figure out what exactly I am going to be creating with the particular stone, so I pretty much have had this blue agate with me for more than six months. Of course storing beads and stones is not a problem as that simply gives me a chance to buy  more bead storage boxes! 
But that is a story for another day. Recently as I was rumaging through my stone collection I came upon this piece and inspiration struck! A lovely blue agate with some black matrix( viens) running through it.
A close up of the chain maille

A close up of the bezel set blue agate and repousse pendant.
For the longest time I had been wanting to use some chain maille on a necklace and I finally got a chance to do that ! The pendant itself is repousse` with some texturing and the chain maille in byzantine chain maille.

Thursday, July 26, 2012

Granulation- pack rat style!

Lately having seen a lot of fold forming work by a metal artists around the world, I too am thinking of experimenting with the technique and here are my baby steps !
Pod cuff with folded pod
Oxidized copper
©2012 Nayna Studios™

 I created this cuff with just the central element the 'pod' with some folding on its sides. I managed to click some pictures ( sorry about the quality of the pics, they were clicked on my mobile phone) Below is a step by step account of my favourite technique 'granulation'
Those cute little granules of copper that you see here within the pod.
When it comes to my copper scrap I am a pack rat! I keep every tiny piece of scrap and filing that I can collect and use these to create the granueles
The way I create these granules is that I  take an approriate quantity of copper scrap and flux it , followed by a very quick heating with my trusty soldering gun.
Well here goes !

Applying flux to the scrap of copper prior to balling

Heating the scrap till it glows a red orange and finally balls up
( note my pile of scrap!! :D)


Placing the granules on the pod shape prior to soldering them


Unfortunately could not photograph the pod being folded but hope you enjoyed the little peak into my studio!

Saturday, July 7, 2012

Put your best face forward!

At a recently concluded jewellery exhibition I had the honour of my college professor drop by, despite his busy schedule and many commitments. As we sat talking about the college days and he gave me an in-depth critique of my work, we talked about different techniques and design elements and that really got me nostalgic. 
You might wonder what the face on the right embossed in copper has anything to do with my college days well, for my graduate work in the last year of college I was required to do a dissertation on a subject of my choice, which happened to be masks! I had created a variety of masks in different metals ranging from lead, to nickel silver and of course my all time fav copper! 
      I recently saw another faboulous and one of my favourite artist Laurie Kern who works under the name 'The Adventurous Silversmith' create an absolutely gorgeous and award winning Cuff named 'Calamari Cuff'. It was basically a Calamari (Squid) worked with the repousse` technique in silver. If you know me you know I work in Copper and since there I was with my college days fresh in my memory, I came up with you guessed it ' Two face cuff' a cuff with repousse`d faces on it. There is nothing special about  the faces except well this is the first time I did a bit of repousse` work in my jewellery. In this second image you can see the faces starting to get more pronounced.
Two face cuff
© 2012 Nayna Studios™
Repousse` copper and oxidized finish
      Unfortunately there are no pics of the piece in further stages but here it is all done.
Two face cuff
© 2012 Nayna Studios™
Repousse` copper and oxidized finish

I gave it a flattened wire soldered edge and textured the space between the spaces to help the faces stand out. 


Thursday, June 21, 2012

Autumn leaf necklace


I had created these enamelled leaves a long time back as part of an enamelled panel, but after a long time of the panel just sitting in my studio, I got tired of looking at it and decided to 'up-cycle' it and use the leaves in my jewellery. This is the first one in the series although I do not think I can use the rest considering size constraints.
         I gave this one a neck piece made of brass and am working on a metal chain to complete the piece. What do you think does it look better as a necklace or where it originally was?

Tuesday, June 19, 2012

Shell beads and blue patina for an evening sale

Blue patina and shell beads necklace
Copper, shell beads
© 2012 Nayna Studios™
For a recent exhibition at a friend's place, I created this blue patina and shell bead necklace, not my usual style but it was a hit !

Monday, April 23, 2012

Nesting in the studio

Birds nest
Copper, baroque pearls
© 2012 Nayna Studios™
Today I was back in the studio after a good long break, well not exactly a break but a break from making jewellery as I had been busy working on a metal working order, something that I had expected would take a couple of weeks actually turned out to be a six weeks job! 
So naturally, I  had to do something completely crazy and fun to get me back in the 'jewellery making mood' :) I was rummaging through my little bowl of odds and ends of wires and had this wild idea to just solder everything together !
I just piled the entire stash onto my firing brick and just randomly arranged the outer shape into a soft square and let my soldering torch go wild. Initially I had thought of melting and fusing the pieces together but then I realized a lot of the thin wires were just melting away creating small gaps, so I placed a few remaining lumps of hard solder and let it all fuse together.
A few of the smaller pieces fell away as I picked up the cooled mass but this beautiful piece was what I had left behind. 
A few baroque pearls fit just snugly creating the 'eggs' in the bird nest ! What do you think should I add a few feathers for special effects? Would you wear this nest as a pendant? Lemme know what you think ?

Friday, April 20, 2012

The original chain maille


As most of you might know, apart from enamelling, chain maille has been a passion, one that I discovered recently but am absouletly in love with! I had know about the history of chain maille in that it was first created and used to make strong weapon resistant armour for soldiers and had seen some examples of the same in mueseums, but mostly as extensions of helmets to protect the neck area. Imagine my surprise when I saw a complete body armour in a shop! 


About a couple of  days ago, I had visited Mumbai's oldest flea market Chor Bazar and stumbled upon this armour in a store display. Thank fully the store owner was kind enough to allow me to click a few pictures of the armour. Wouldn't it make for a stunning conversation piece? If you look closely there is also a head piece hanging in the foreground with pieces for the legs hung on the sides.

Here are two close ups with the chain maille pattern clearly visible, not these are double layered for added protection no doubt. Hat's off to the first artist to incorporate this beautiful work in jewellery !


Wednesday, April 4, 2012

Something fishy earrings
Vitreous enamel
© 2012 Nayna Studios™


With the success of the something fishy bracelet, I was prepared to create more of the same pieces, but what I was not expecting was a request for a smaller set of fishies to be used as earrings ! Well this of course was a fun challenge, so here is what I came up with. A pair of fish earrings with wire bails and of course simply ear wires. After all the fishies have to be the centre piece. :)


Friday, February 24, 2012

Fish bracelet

 Rummaging in my to-be-finished-at-a-later-date-box I found a handful of perforated fish! They looked a little sad so I gave them a coat of enamel and linked them up voilĂ ! a cute little fish bracelet! don't they look sweet swimming about in a circle, I also had one left over to go as a pendant or a charm for a simple bracelet.
Fish bracelet
Copper, vitreous enamel
© 2012 Nayna Studios™

Tuesday, February 21, 2012

Romanov chain maille

Add caption
 As you know I am madly in love with all things chain-maille and keep trying out new weaves so here is my latest experiment. I usually only try out any weave in just the one metal till I am sure that it will work out with me, as some weaves I do tend to find a little tough ( guess I am still a newbie :P ) But this weave simply had to be a bi-metal design, and there is another first, my first ever successful experiment with German silver a.k.a. Nickel silver. Its a little harder than copper but I think closer to brass in work hardening, a little bit of annealing did help though and gets a nice finish when tumbled. So which one do you thinks works better the one is just copper or the bi-metal one ??